
Quick start
The shortest path from nothing to your agent's first reply in Open WebUI: install the Pipe, approve the device once, say hello. Each step ends with a check, so you know it worked before you move on.
Applies to: Pipe
Valves: GATEWAY_URL, GATEWAY_TOKEN, AGENT_ID
Before you start
You need:
- A running OpenClaw Gateway, reachable from the machine Open WebUI runs on. No OpenClaw yet? Install it first.
- Admin credentials for your Open WebUI instance.
- Your OpenClaw Gateway API token. This is the value of
gateway.auth.tokenin your OpenClaw config; ask whoever runs your Gateway if you don't have it. uvon the machine that runs the installer (not inside Open WebUI). That machine only needs to reach Open WebUI's URL.
If you don't have uv, on the machine that will run the installer:
curl -LsSf https://astral.sh/uv/install.sh | shCheck: uv --version prints a version.
Open WebUI and OpenClaw on different machines? The steps are the same; two hosts says which step runs where.
1. Get the code
On the machine that runs the installer:
git clone https://github.com/Eliav2/openclaw-openwebui-integration
cd openclaw-openwebui-integration
Check: ls install.py openclaw_pipe.py lists both files.
2. Run the installer
In the repo checkout:
uv run install.py install --wizardThe wizard prompts for everything it needs. Press Enter to accept a default shown in brackets:
| Prompt | Default | What to enter |
|---|---|---|
| Open WebUI base URL | http://localhost:8080 | The URL you open Open WebUI at, from this machine |
| Open WebUI admin email | Your admin login | |
| Open WebUI admin password | Your admin password | |
| OpenClaw gateway address (host:port) | localhost:18789 | The Gateway as seen from the Open WebUI backend. Behind a TLS proxy, wss://host |
| OpenClaw gateway token | gateway.auth.token from your OpenClaw config | |
| OpenClaw agent id | main | Leave as main unless your Gateway defines other agents |
The installer creates the Pipe in Open WebUI, sets its valves, and then sends two short test messages to your agent. Every line it prints starts with ✓ (done), ! (a warning) or ✗ (a failure). The installer explains each step.
Check:
- If you ran it on the Gateway host, it approves the new device by itself and ends with
✓ Smoke test passed. Skip to step 4. - If you ran it anywhere else, expect it to stop at the smoke test with
✗ Smoke test failed: ...and the words pairing required. That is the normal first run, not a failure: the Gateway is holding the new device until you approve it.
3. Approve the device
A first install pairs a brand-new device. On the Gateway host:
openclaw devices list
openclaw devices approve <request-id>
Take <request-id> from the pending request that openclaw devices list shows.
Check: run openclaw devices list again. The request is no longer pending.
You approve once. The identity is kept across restarts and reinstalls; see device pairing.
4. Re-check the install
In the repo checkout:
uv run install.py healthcheckIt prints the current state, then runs the same smoke tests as install.
Check: the last lines are ✓ Smoke test passed and ✓ Route smoke test passed (...). On the Gateway host it also exits 0.
On any other machine, the status block shows "device_paired": false and the command exits 1 even when everything works: the installer asks the local openclaw CLI whether the device is paired, and there is none here. The smoke tests are the real answer.
5. Say hello
- Reload Open WebUI. OpenClaw · Default should appear in the model picker.
- Select it and send "hello".
Check: the reply streams in token by token, not all at once at the end.
You should see
The installer (or healthcheck) ends with:
  ✓ Smoke test passed
  ✓ Route smoke test passed (...)
and the agent's reply streaming into the chat:
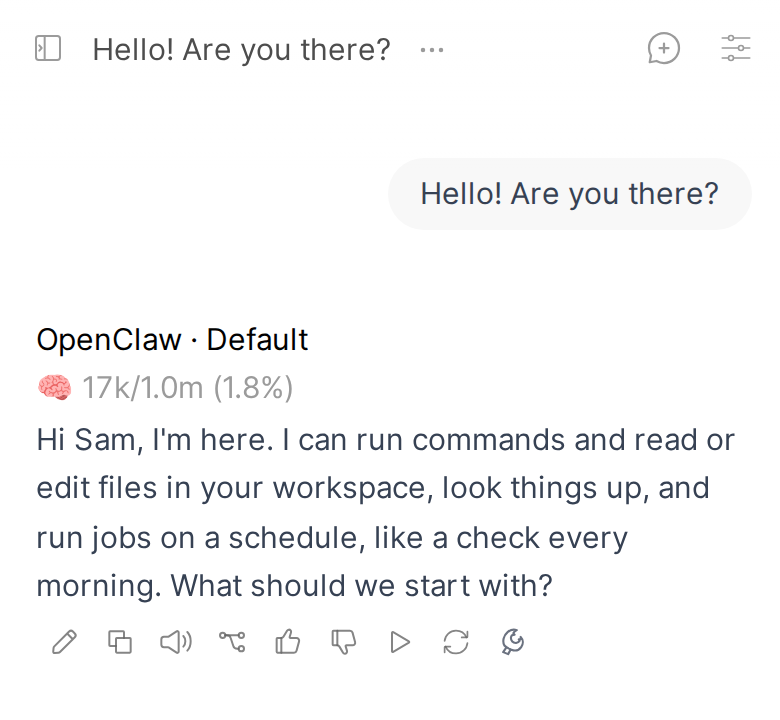
Something off?
In the repo checkout, re-check the install and run the smoke test again:
uv run install.py healthcheck- Pairing required in the smoke test: the approval in step 3 hasn't landed yet. Approve the device, then re-run
healthcheck. - Login failed: check the Open WebUI URL, email and password.
- Anything else: see Troubleshooting.
Next steps
- Status button: context, rate limits and sub-agents, one tap away.
- Thinking control: set reasoning effort per chat.
- Agent skills: teach your agent to ask you questions as dialogs and to send images.
- The installer: every flag, the non-interactive form for scripts, and what
installchanges.